FiscalNet
← Back to Useful Information
Download and installation · FiscalNET

Download. Install.
Connect.

Choose V3 for Windows or Android, or the V2 installer for your existing setup. Download the app and follow the steps below on the same page.

Before you install

Check the version

If you are already using FiscalNET, check the installed version and retain the connection parameters. The transition from V2 to V3 is being prepared in collaboration with the provider of the sales application.

Identify the equipment

Note the exact model and the connection used. Prepare the data cable or the network parameters from the device documentation.

Prepare the integration

Confirm the method of communication with the sales application and the required licence. Integration of the bank POS and the weighing scales requires FiscalNET PLUS.
V3 · Windows

Install FiscalNET V3 on your computer

  1. Check the system: Windows 10, minimum version 1809 / build 17763, or Windows 11.
  2. Download the official FiscalNetInstall.exe installer using the button above.
  3. Run the kit and follow the instructions displayed. If the model requires a USB driver or a manufacturer's library, use the resources indicated in the equipment datasheet.
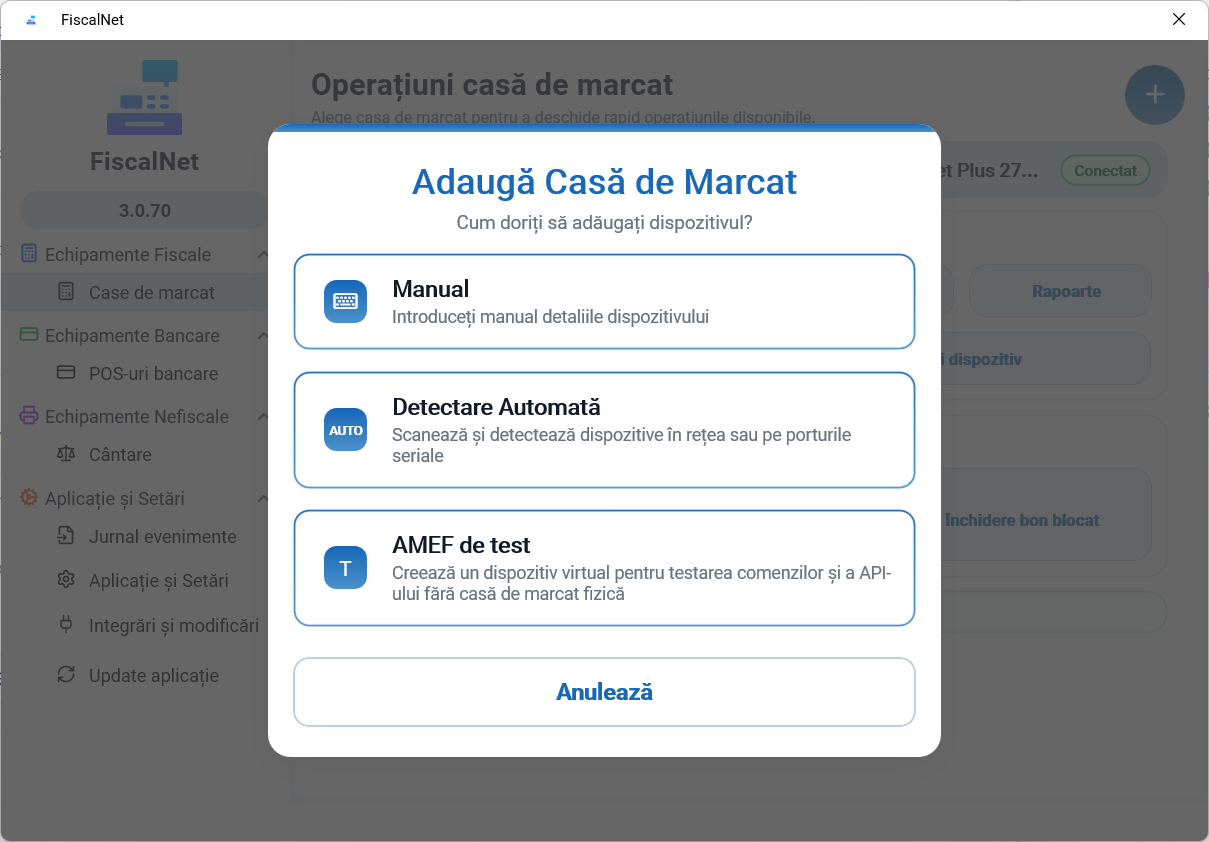
  4. Launch FiscalNET and open Fiscal Equipment → Cash Registers. For a new device, continue with + Add and the model guide.
FiscalNET V3 — Choosing the method for adding on WindowsEnlarge image
FiscalNET V3 on Windows · open Cash Registers → +, then choose the method of adding. Demonstration screenshot.
V3 · Android

Install FiscalNET on Android

  1. For phones or tablets, use the official FiscalNET app from Google Play. For an Android fiscal terminal, confirm the package appropriate to the model, available in the manufacturer’s store.
  2. Install the appropriate package and open the application. .exe kits and Windows drivers do not install on Android.
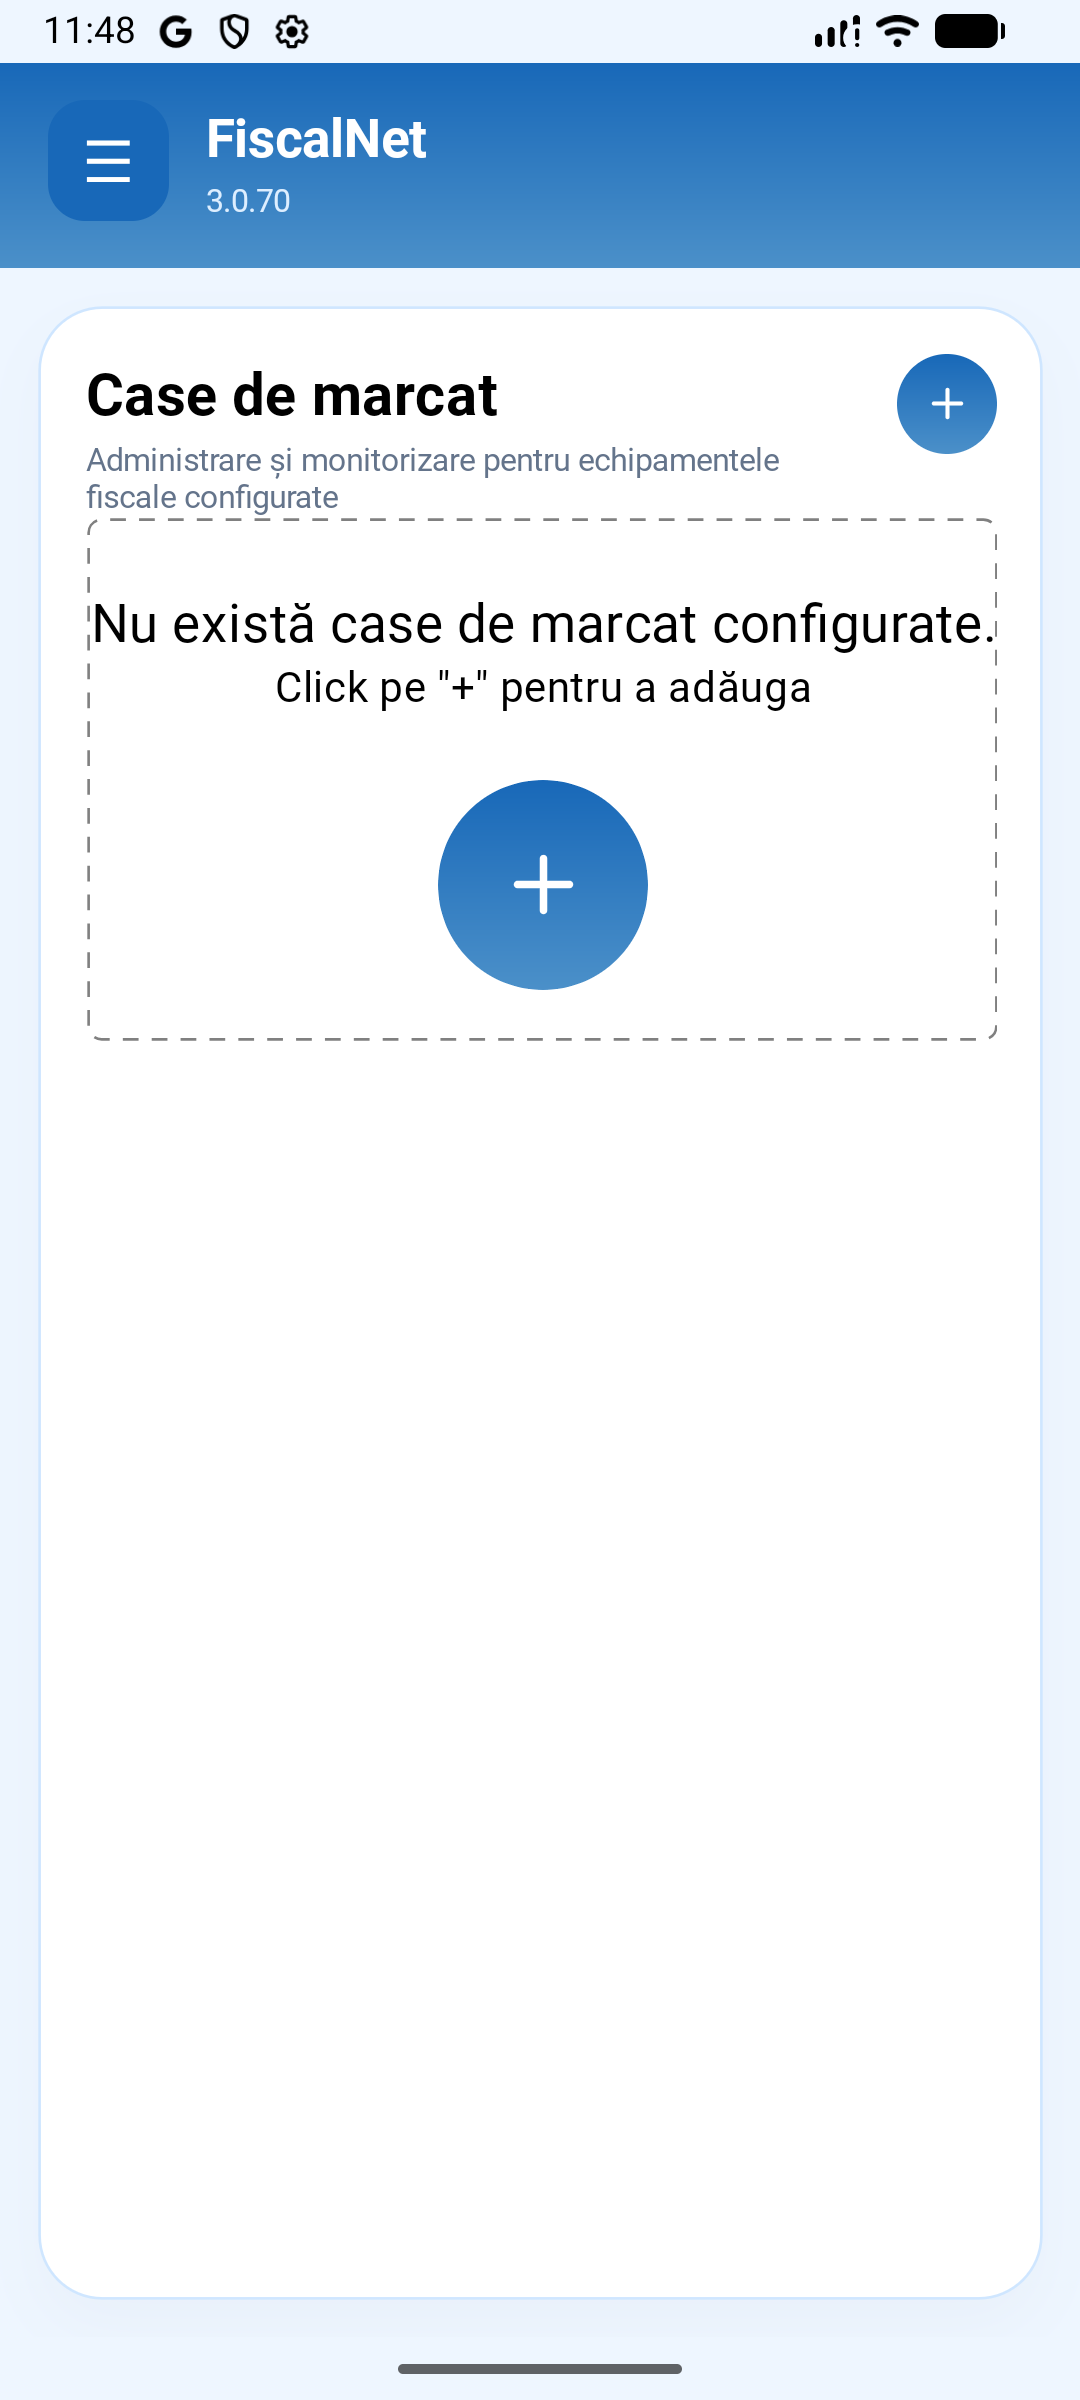
  3. For an external cash register, open Cash Registers and tap +. Select only the profile and connection confirmed for your model on Android.
  4. For a terminal with an integrated printer, follow the distributor’s procedure and the terminal guide. The form for an external cash register does not replace these steps.
FiscalNET V3 — Cash Registers page on AndroidEnlarge image
FiscalNET V3 in Android emulator · in-app guidance, without a tested physical connection.
V2 · Windows

Install or reinstall FiscalNET V2

Use this path if your sales application works with V2. The menus and the kit differ from V3.

  1. Before reinstalling, make a note of the driver type, port, speed or IP address, and the folder used by the sales application.
  2. Download the official FiscalNetSetup.exe installer using the button above.
  3. Install the application and the communication components required for the model, as per its documentation.
  4. Open Configurare and complete the confirmed settings for your device. Follow the V2 guide to check the connection and the orders folder.

Configurare și manuale V2

After installation: connect and check

  1. Prepare the device

    Power up the equipment and use the cable or network indicated in the model datasheet. Set the communication mode according to the manual; do not change the fiscal parameters for a verification.

  2. Complete the connection

    Follow the model guide. On Windows, identify the COM port for USB/Serial; for the network, use the confirmed address and port. Do not copy the values from the demonstration screenshots.

  3. Check the response

    In V3, after filling in the parameters, use Test Connection and Save. In V2, the check in Configuration follows. Confirm the identification and status of the device before use.

  4. Configure the sales application

    Complete the file folder or API settings together with the application provider. The communication check does not require the automatic issuance of a receipt or a fiscal report.

The next connection?
Your business.

Download FiscalNet and configure your equipment.