The USB device does not appear
Check the power supply, the data cable and the USB driver. If the driver creates a virtual COM port, check it in Device Manager.

The hardware interfaces are documented. The compatibility of this model with FiscalNET requires confirmation.
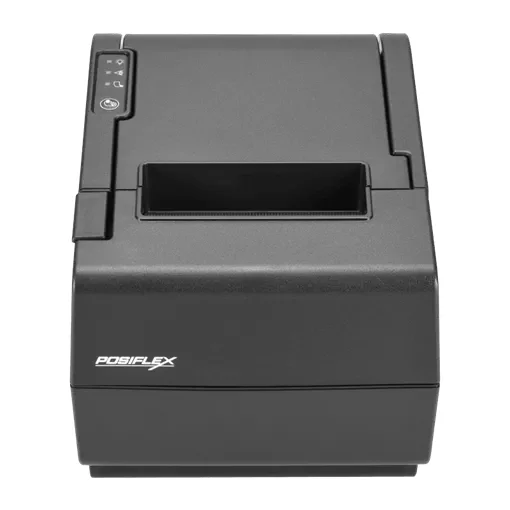
POS thermal printer with interfaces for the point-of-sale system. The name AURA 8900 and the photograph of the casing do not confirm the existence of an approved fiscal configuration.
The manual describes a thermal POS printer. A fiscal configuration and its compatibility with FiscalNET must be identified separately.
Make a note of PP-8900/AURA 8900 and all the integrator’s labels. The Posiflex manual describes a POS thermal printer; any fiscal configuration is identified separately.
Send the full model and serial number to support. Request confirmation of the fiscal configuration and the FiscalNET profile before selecting a licence or an installation procedure.
Select USB-B, RS-232, or Ethernet if the installed version has LAN. For normal communication, the manual requires a single interface to be connected; the initial LAN setup has a separate USB procedure.
For POS printing, the manufacturer publishes USB/COM drivers and network utilities. Fiscal integration may require other components, which must be specified by the integrator.
A POS test page confirms printing, without confirming fiscal issuance. Fiscal verification is carried out only after confirmation of the device, components and profile.
The screenshots show the standard application, not a connection procedure validated for AURA 8900. The FiscalNET compatibility and profile for this model require confirmation.
Open Fiscal Equipment → Cash Registers and tap + Add. Select Manual to complete the device profile and parameters. If the device already exists in the list, open its configuration.
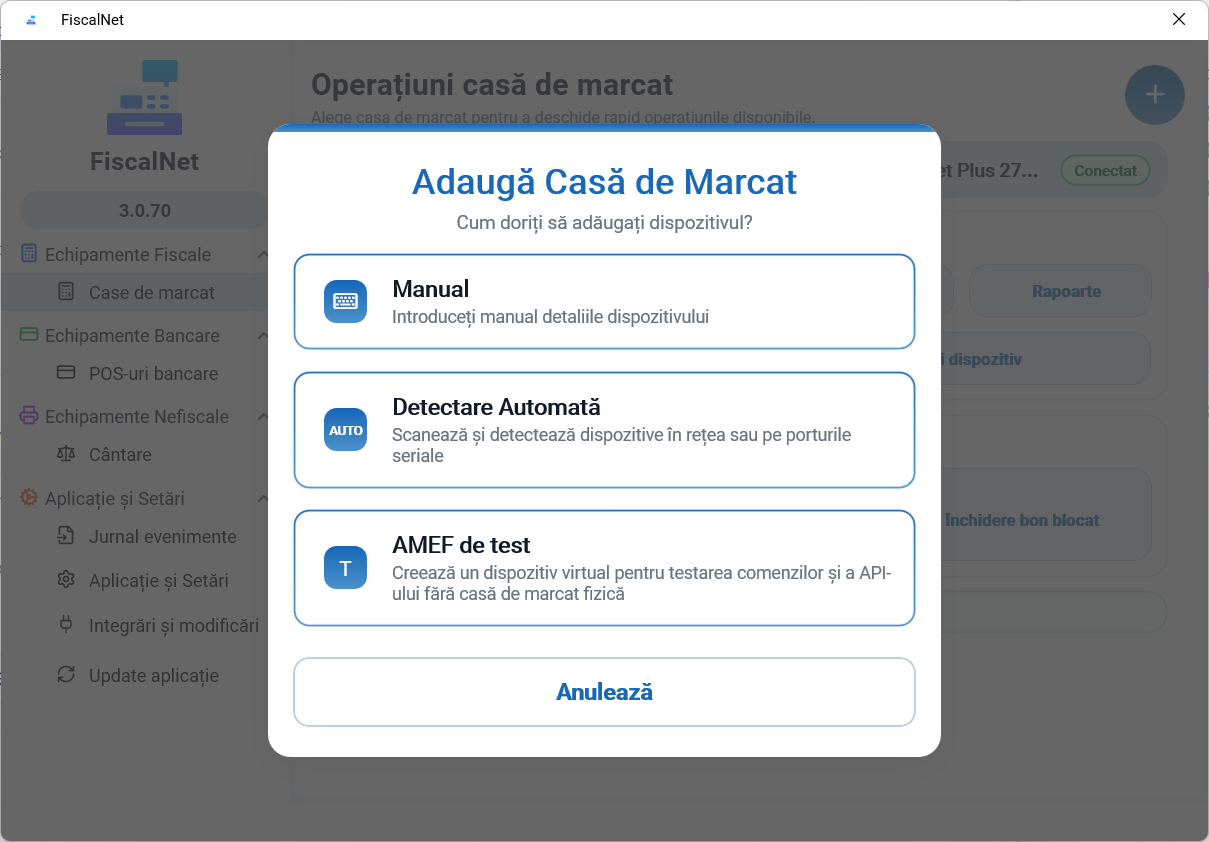 Enlarge image
Select the profile that matches the model. For USB, select the device or the virtual COM port created by the driver; enter the baud rate only when the profile requires it. For RS-232, enter the COM port and the device speed. For the documented network, enter the IP address and the port of the device. The values in the screenshot are examples.
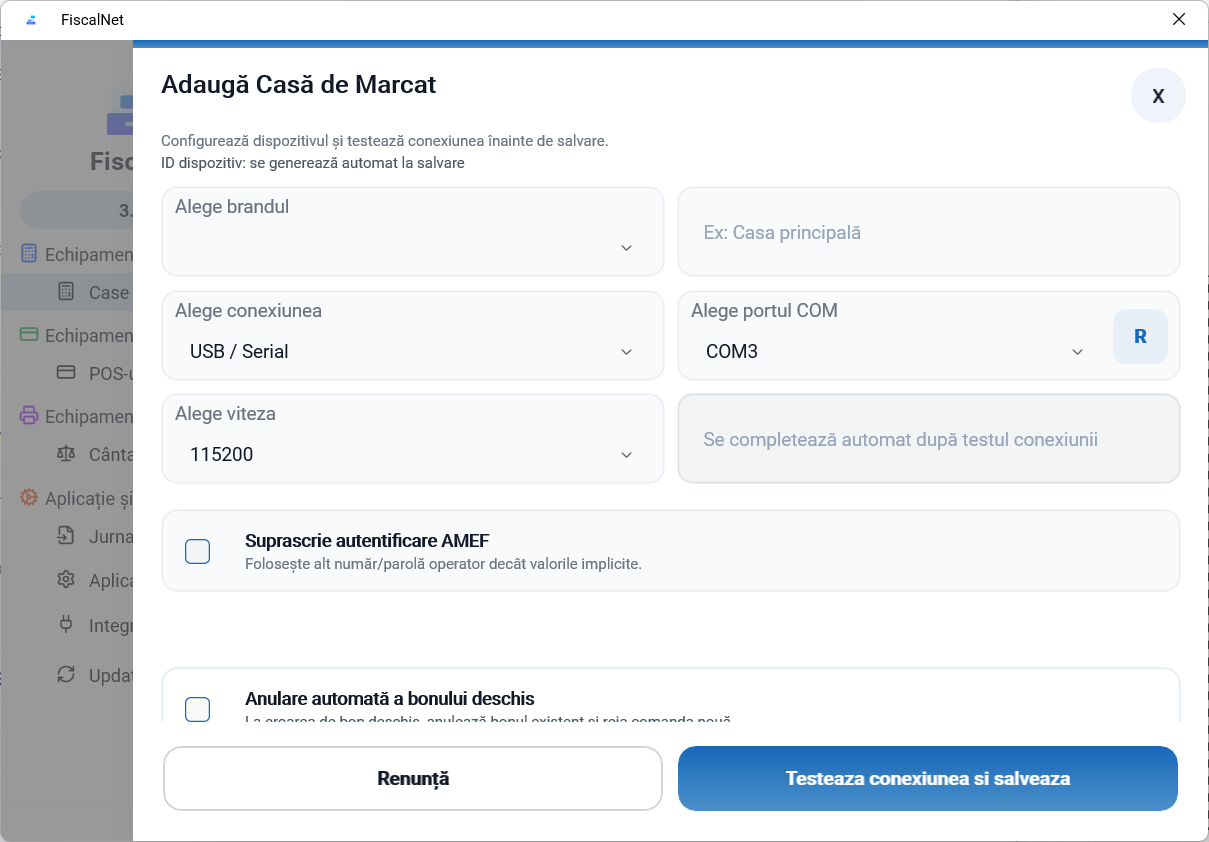 Enlarge image
Use Test Connection and check the device’s identification and status. Save the configuration after a correct response.
If the device is not respondingIn FiscalNET, open Case de marcat and tap +.
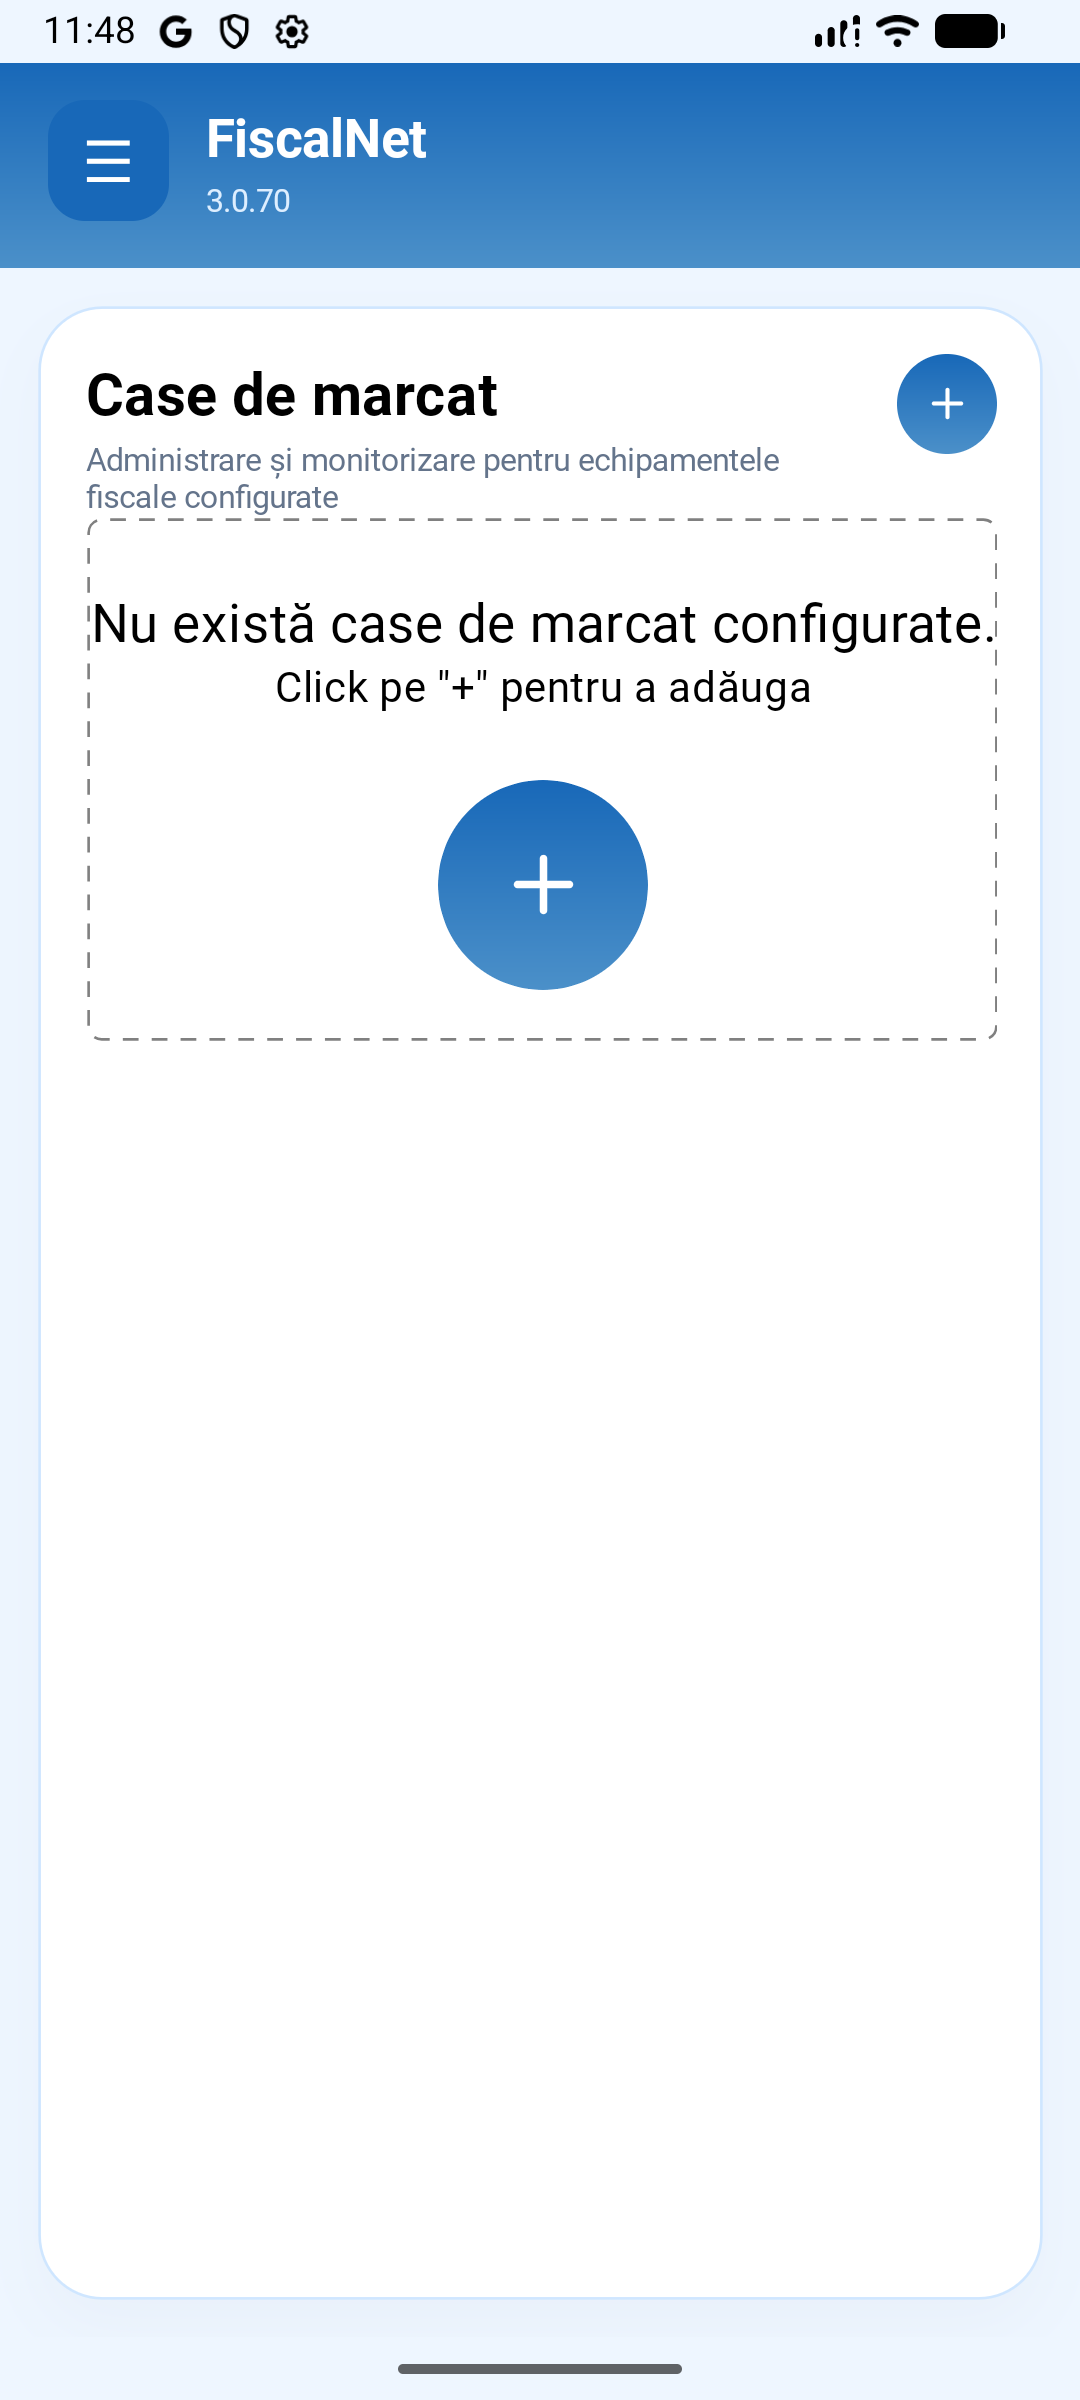 Enlarge image
Select Manual to complete the profile and parameters. The test AMEF is a virtual device.
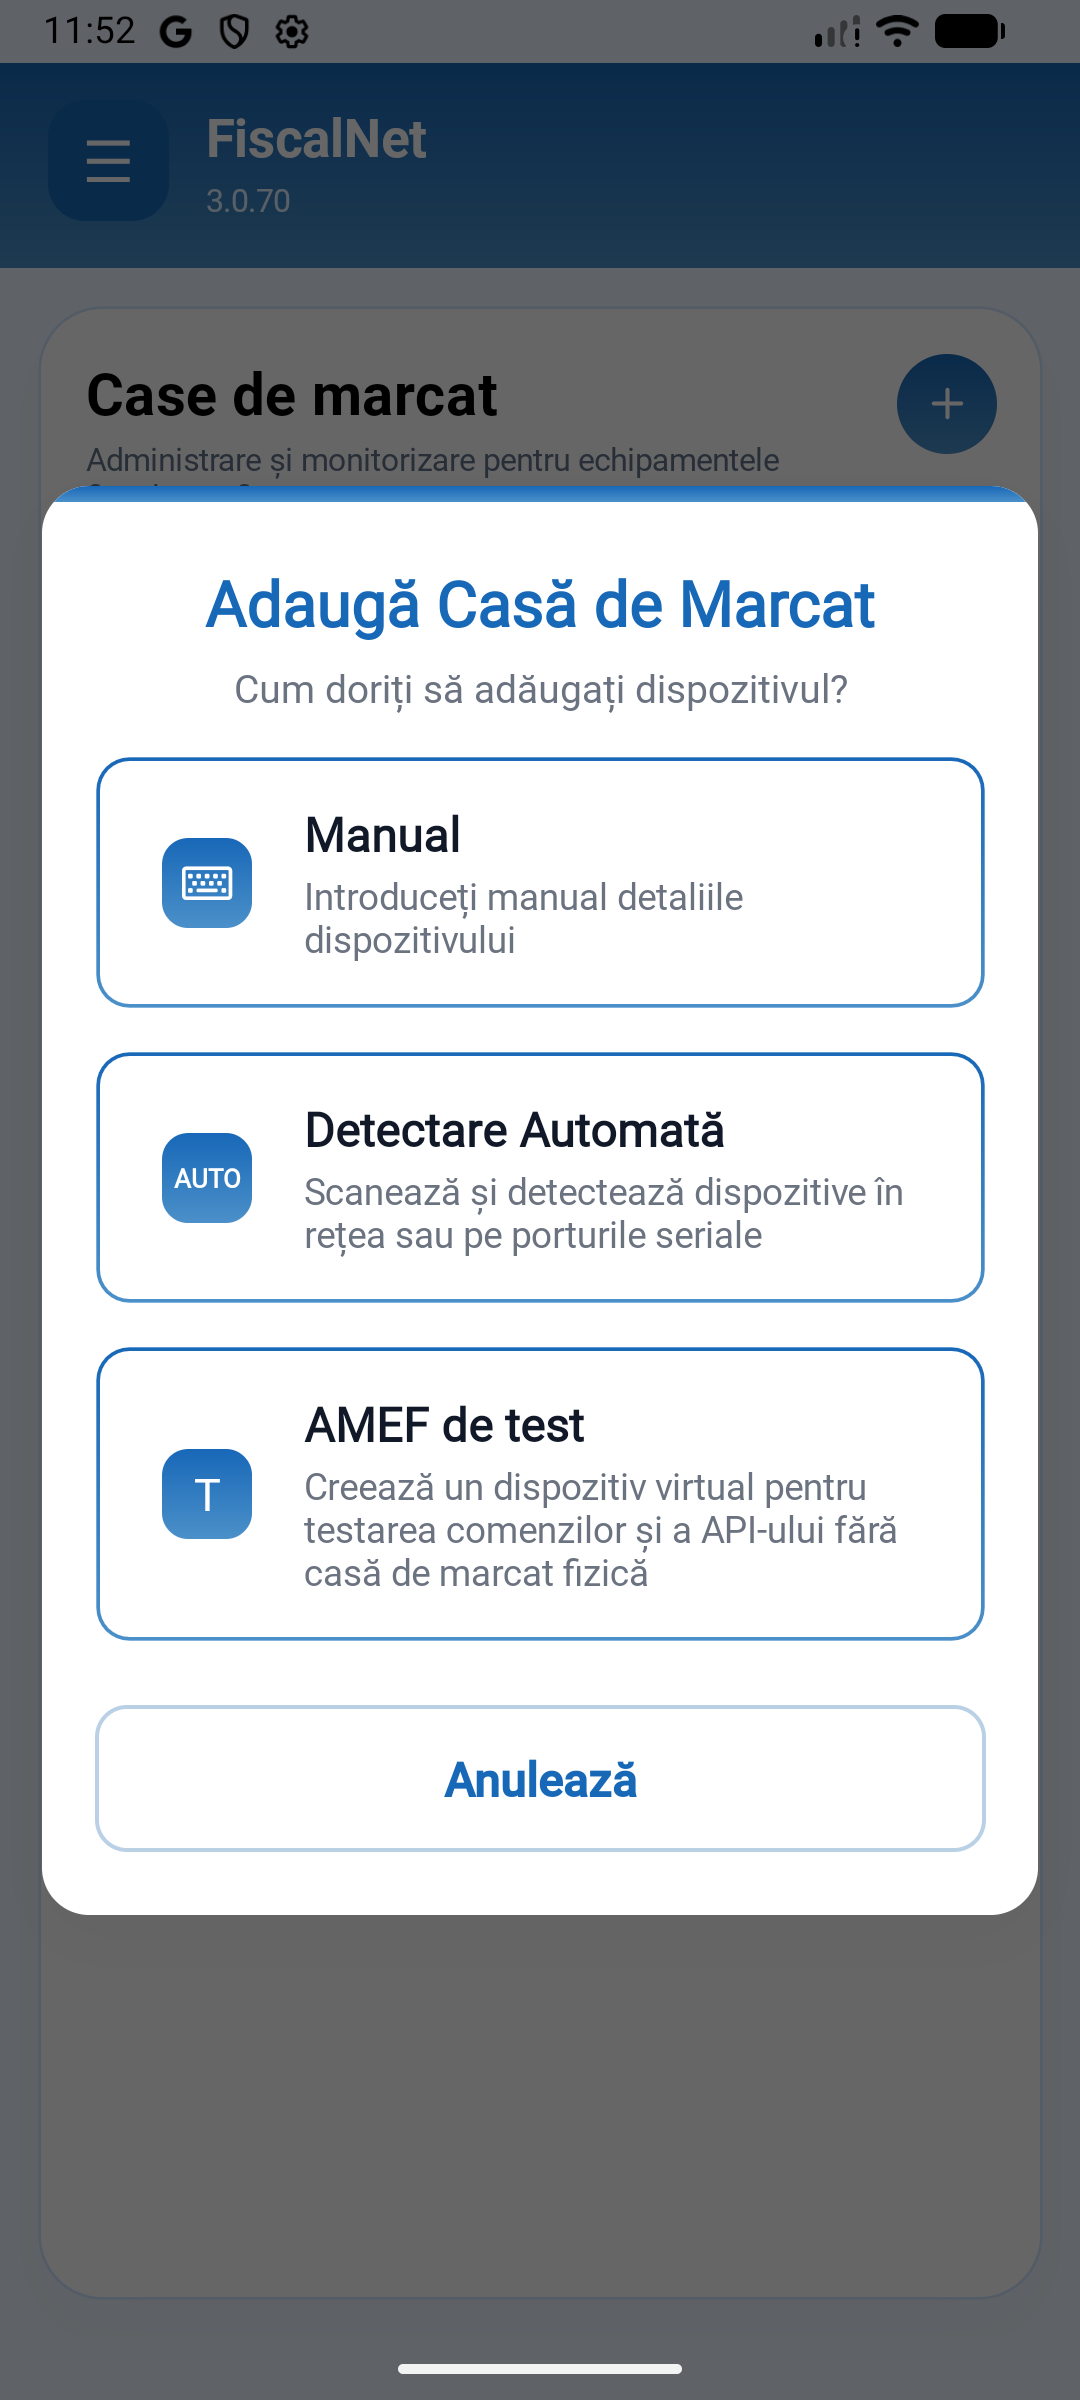 Enlarge image
Select the supported profile for the model and open the connection field.
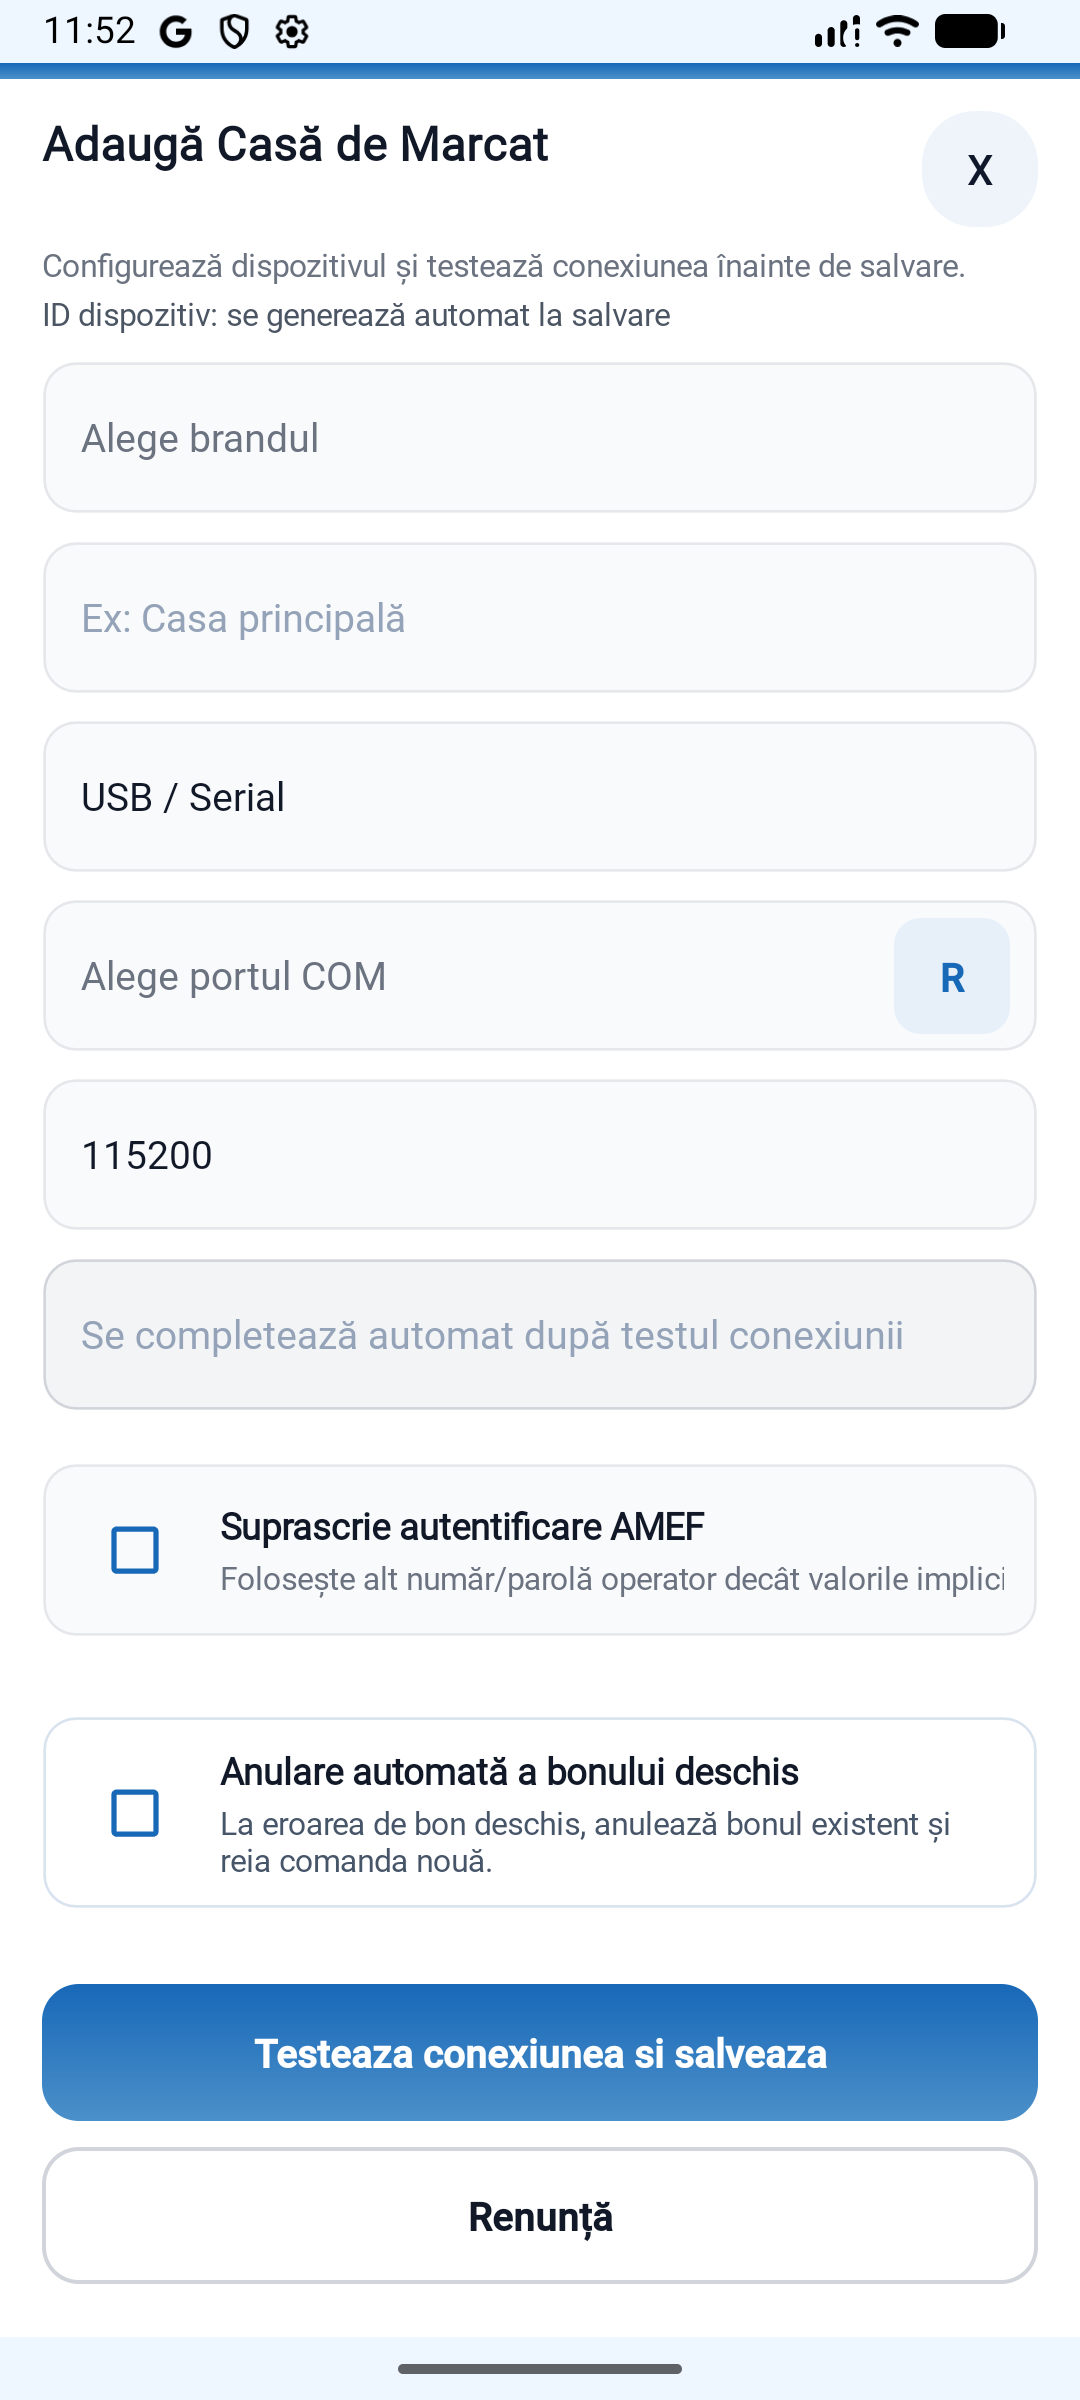 Enlarge image
Select the interface supported by the profile and fill in the device parameters. For the network, use the configured IP address and port. Under USB, select the device detected on Android.
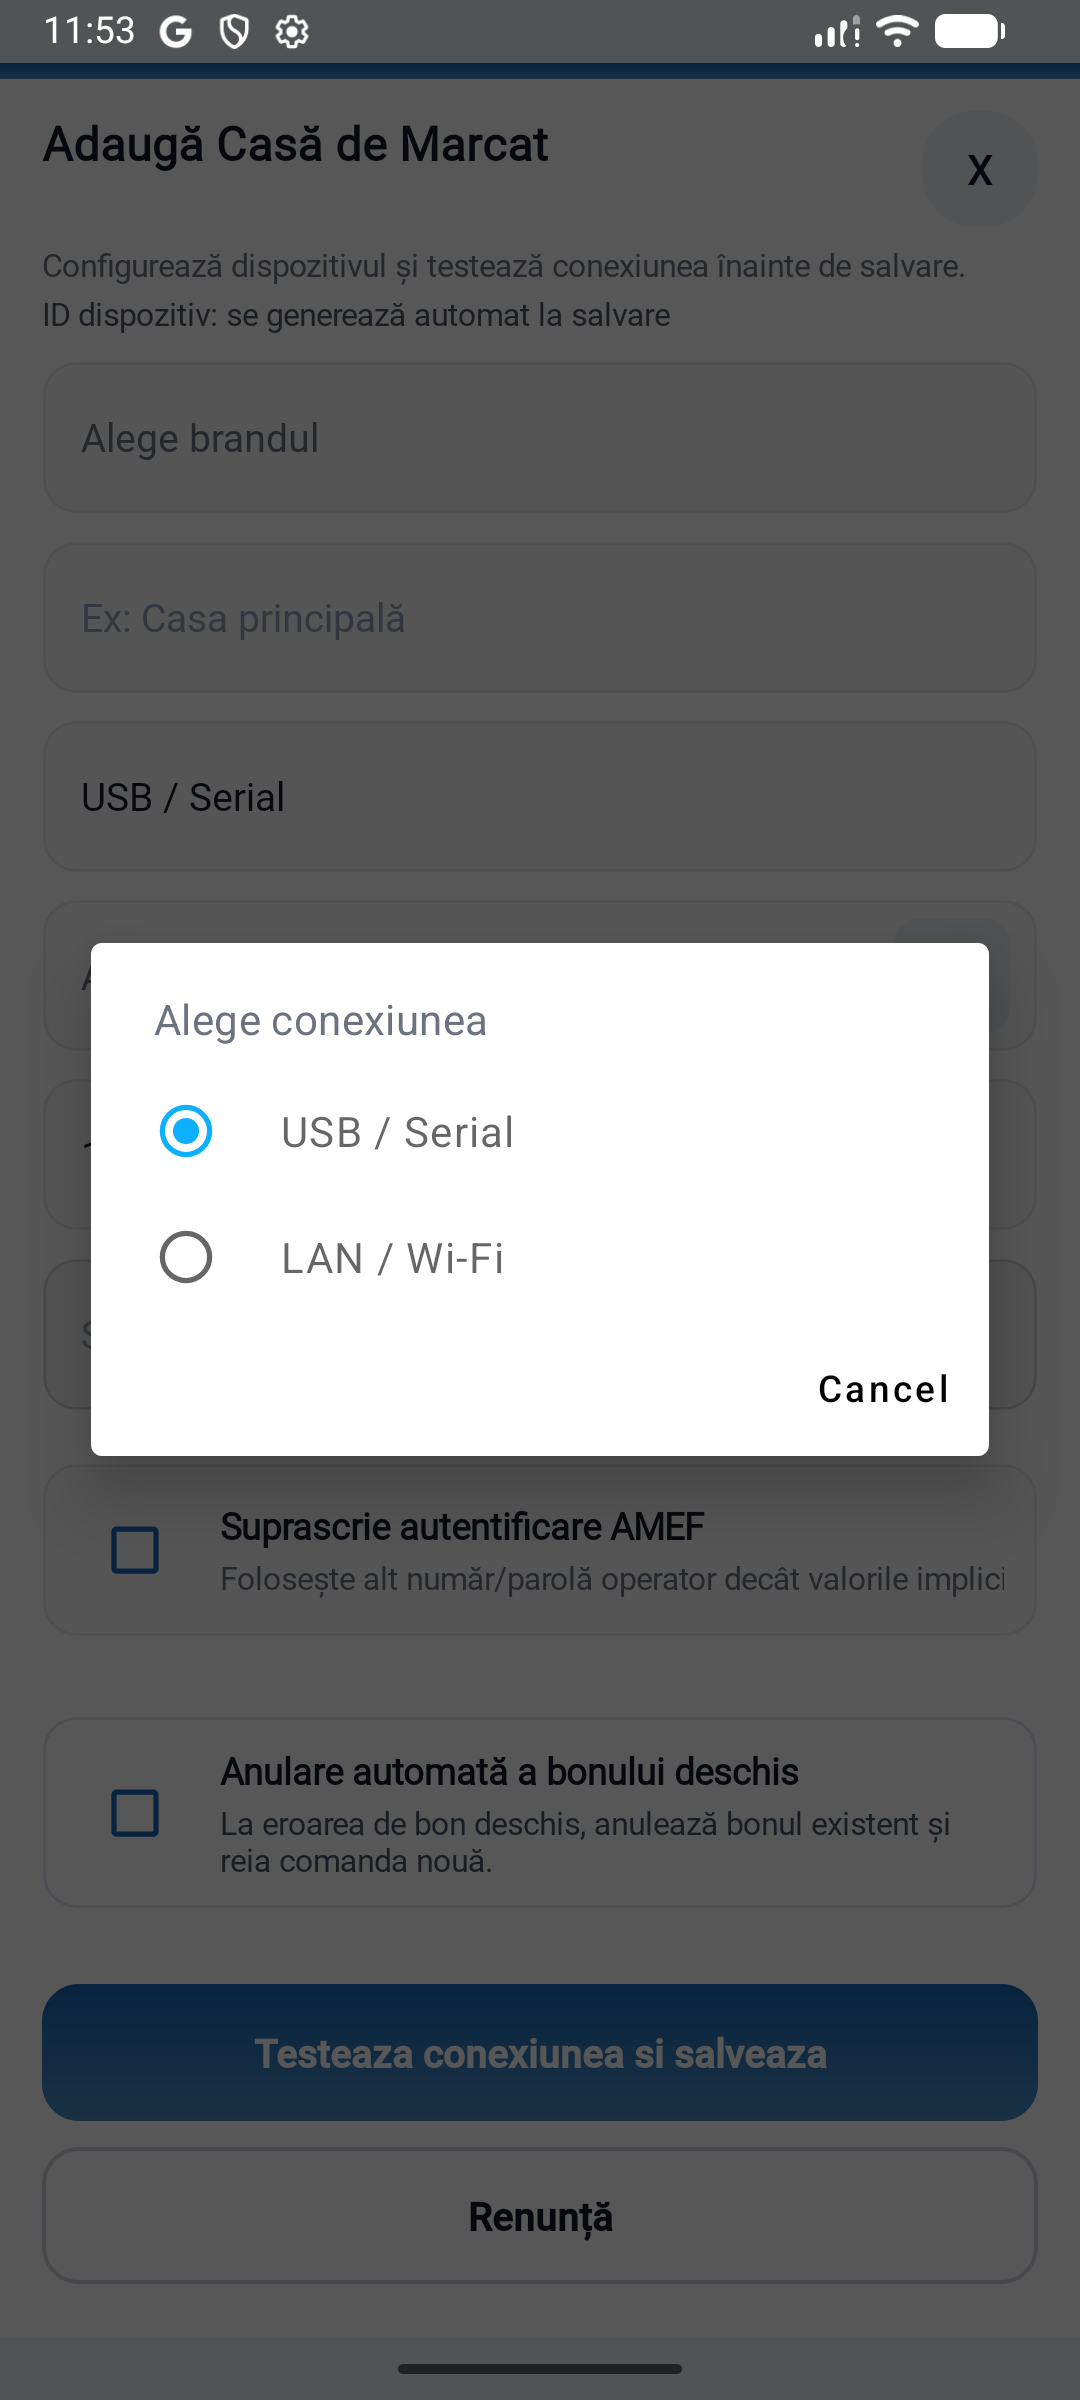 Enlarge image
Use Test Connection and check the device’s identification and status. Save the configuration after a correct response.
If the device is not respondingDo you use FiscalNET V2? View the V2 configuration with images
Check the power supply, the data cable and the USB driver. If the driver creates a virtual COM port, check it in Device Manager.
Check the operating mode and the device profile. For USB, check the device or the virtual port assigned by the driver. For RS-232, compare the COM port and the baud rate. For the network, compare the IP address and the communication port.
Close the other programs that are using the device. After an interruption, check the status of the receipt before resending.
Send the device model, the connection used, the FiscalNET version, and the error message.
Download FiscalNet and configure your equipment.